DIY Plumbing Repairs Every Homeowner Should Know
DIY Plumbing Repairs You Can Do Yourself
There’s a specific moment every homeowner hits — a dripping faucet, a slow drain, a toilet that won’t stop running — where you have to decide: call a plumber, or try it yourself first? Honestly, more of these problems fall into the second category than most people assume. A surprising number of DIY plumbing repairs just require a bit of patience and the right tool, not professional training.
I’ve noticed people jump straight to “call a plumber” for issues that would’ve taken fifteen minutes to fix themselves, and cost a callout fee that’s arguably more annoying than the problem itself. Not every plumbing issue is DIY-friendly, to be fair. But a solid chunk of the common ones genuinely are.
Let’s go through the repairs worth attempting yourself before reaching for the phone.
Which Plumbing Repairs Are Safe to DIY
Quick answer: Simple DIY plumbing repairs generally include fixing running toilets, clearing minor clogs, replacing faucet washers, and tightening loose fittings — anything involving major pipe replacement, gas lines, or sewer connections should go to a licensed plumber instead.
The general rule I use: if it’s a surface-level fix involving a visible fixture, it’s probably fine to try. If it involves cutting into a wall, working with gas lines, or touching the main sewer line, that’s where I’d draw the line and call someone qualified.
There’s also a cost-benefit angle worth considering. A $20 part and thirty minutes of your time versus a $150 service call for something genuinely simple — that math usually favors trying it yourself first.
Fixing a Running Toilet
Quick answer: A running toilet is almost always caused by a worn flapper valve or a misaligned float, both of which are inexpensive parts that most people can replace in under 20 minutes without any special tools.
This is probably the single most common DIY plumbing repair, and it’s genuinely one of the easiest.
Steps to try:
- Remove the tank lid and watch what’s happening while it runs
- Check the flapper — if it’s not sealing properly, that’s usually the culprit
- Replace the flapper (a universal one from any hardware store usually fits)
- Check the float height, adjusting if water is running too high and spilling into the overflow tube
Picture a toilet that’s been quietly running for weeks because nobody noticed. That “quiet” running can add a real chunk to a water bill over time. A $10 flapper replacement usually solves it completely.
Unclogging a Slow or Blocked Drain
Slow drains are almost always fixable without chemicals, which is genuinely better for your pipes long-term anyway.
What to try, roughly in order:
- A plunger first, for both sinks and toilets — often underused for sink clogs specifically
- A drain snake or zip-it tool for hair and debris clogs, especially in bathroom sinks and tubs
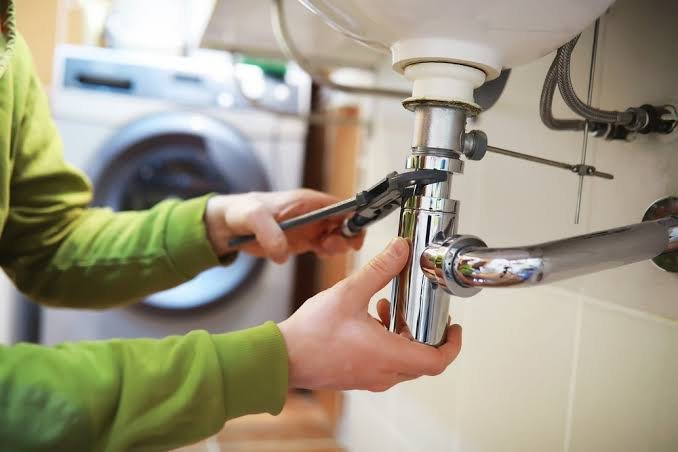
- Removing and cleaning the P-trap under the sink (messy, but effective for stubborn clogs)
- Baking soda and vinegar as a gentler alternative to chemical drain cleaners
[link to related guide on how to fix a clogged drain at home here]
Has this ever happened to you — a slow drain that you keep meaning to deal with, and it just gets slower over weeks? Catching it early with a plunger or snake is much easier than waiting until it’s fully blocked.
Fixing a Dripping Faucet
That constant drip isn’t just annoying. It adds up on the water bill, and the sound alone is enough to justify a fix.
Quick answer: Most dripping faucets are caused by a worn-out washer, O-ring, or cartridge inside the faucet body, and replacing the specific part is usually a straightforward DIY plumbing repair once you know which faucet type you’re dealing with.
General process:
- Shut off the water supply to that fixture first, always
- Remove the faucet handle to access the internal components
- Identify whether it’s a washer, cartridge, or ceramic disc faucet type
- Replace the worn part with a matching one from a hardware store
Faucet types vary enough that it helps to look up your specific brand and model before starting. A five-minute search saves you from buying the wrong part twice.
Repairing a Leaky Pipe Connection (Not a Burst Pipe)
There’s a real distinction here worth making clear: a loose or slightly leaking connection is often DIY-friendly. A burst or fully cracked pipe is not — that one needs a professional, no shortcuts.
For minor connection leaks:
- Tighten the connection first with a wrench, sometimes that’s genuinely all it needs
- Apply plumber’s tape (Teflon tape) to threaded connections for a better seal
- Use a pipe repair clamp for small pinhole leaks as a temporary fix
- Replace a worn washer or gasket at the connection point if tightening alone doesn’t help
I’d stress the word “temporary” for clamps specifically — they buy time, but a proper repair or replacement is still needed eventually.
Replacing a Showerhead or Faucet Fixture
One of the easiest DIY plumbing repairs on this entire list, and also one of the most satisfying upgrades for the effort involved.
- Unscrew the old fixture, usually just requires a wrench or even hand strength
- Clean the threads and apply fresh plumber’s tape
- Screw on the new fixture, hand-tight then a slight turn with a wrench
- Turn water back on and check for leaks at the connection point
[link to related guide on essential plumbing tools every homeowner should own here]
This swap rarely takes more than fifteen minutes and doesn’t require shutting off water to the whole house, just that fixture.
When to Stop and Call a Professional
Not every plumbing issue belongs on a DIY list, and knowing the line matters as much as knowing the fixes.
Call a plumber for:
- Any issue involving the main water line or sewer connection
- Gas line work of any kind, no exceptions
- Water heater installation or major repair
- Repeated clogs across multiple drains at once, which often points to a deeper line issue
- Any repair where you’re not confident about how to shut off water safely first
None of this is meant to discourage DIY plumbing generally. It’s just about recognizing which problems genuinely need licensed expertise versus which ones are within reasonable reach.
Basic Tools Every DIY Plumber Should Have
A small, well-chosen toolkit covers most of what’s on this list:
- Adjustable wrench and a set of pliers
- Plunger (separate ones for sink and toilet use, ideally)
- Plumber’s tape and pipe joint compound
- Basic drain snake or zip-it tool
- A bucket and old towels, because plumbing is rarely a clean job
None of these tools are expensive, and having them on hand means you’re not scrambling to buy something mid-repair with water already shut off.
FAQ: Common Questions About DIY Plumbing Repairs
What plumbing repairs should I never attempt myself? Gas line work, main sewer line issues, and water heater installation should always go to a licensed professional due to safety risks and code requirements.
How do I know if my toilet’s running because of the flapper or the float? Watch the tank while it’s running — if water is spilling into the overflow tube, adjust the float; if the flapper isn’t sealing after the tank fills, replace it.
Is it safe to use chemical drain cleaners for DIY plumbing repairs? They can work for minor clogs, but frequent use can damage pipes over time — a plunger or drain snake is generally a safer first choice.
How much can DIY plumbing repairs actually save compared to hiring a plumber? For minor fixes like a running toilet or dripping faucet, DIY can save the cost of a service call entirely, often $75-150 depending on the area.
Do I need special tools to start doing basic DIY plumbing repairs? Not really — a wrench, plunger, plumber’s tape, and a basic drain snake cover the vast majority of common household plumbing fixes.
What’s the biggest mistake people make with DIY plumbing repairs? Not shutting off the water supply before starting, which turns a simple fix into an unnecessary mess and sometimes water damage.
Conclusion
A good chunk of common plumbing problems — running toilets, slow drains, dripping faucets, loose fixtures — fall well within reach of a confident DIY plumbing repair, with basic tools and a bit of patience. The trick is knowing where that reach ends: gas lines, sewer connections, and water heaters are where professional help genuinely earns its cost.
Next time something starts dripping or running, give yourself fifteen minutes with the right tool before reaching for the phone. You might be surprised how often that’s all it takes.
Suggested image alt text:
- “Replacing a worn toilet flapper valve during DIY repair”
- “Using a wrench to tighten a leaking faucet connection”
- “Plumber’s tape being applied to threaded pipe fitting”